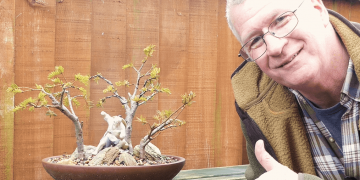
Three days ago I was walking around the bonsai garden in a T-shirt with the sun blazing down on my balding scalp. With no sound of ‘drilling or cutting’ coming from the neighbours I took the plunge and grabbed two of my Tridents to try my hand at Thread Grafting. Let me say one thing now. This is not a difficult task so please read on if you think you have a bonsai that is in need of another branch. Just be aware that the clock is ticking – you do not want to try this once the buds have started to swell.
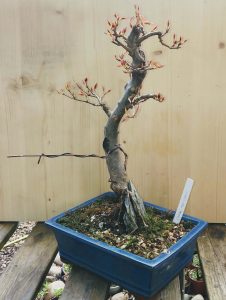
The first and last time I tried doing this was back in early winter, 2019. It went very well and I lovingly kept it protected in the greenhouse over winter – occasionally going out to admire my technical prowess! But, in the early-spring enthusiasm of 2020 I had what I could only call, a ‘brain fart’! The threaded whip was starting to ‘green up’ and looked like it was going to be a big success. So, to help it along, I decided to remove all of the buds. I know, everyone right now is smacking there foreheads in disbelief.
To this day, I still cannot understand what was going through my mind. Understandably, the graft failed and all I could do was admire the speed with which I had undone all my expert work!
Can I do this to ALL my Bonsai?
If you have a deciduous tree and the buds have not started to swell, then yes, you can try a thread graft. However, as this requires buds to be ‘threaded’ through a hole in the trunk, it is probably best to use a tree with small compact buds. Ideally, I would be looking at either a Japanese Maple or perhaps even a Hornbeam. Certainly not a Beech 🙂
Another point to consider is whether or not the species you want to use buds readily from old wood. Both Hornbeam and Trident Maple regularly send out new growth from unexpected and advantageous places on the trunk of a bonsai. With this in mind, I find it better to wait a few years before deciding on Thread Grafting as an option.
The key factor is the bud size, because your aim is to be able to thread as much of the whip through the trunk as possible – you want a nice snug fit, without knocking off the buds you need for this to work.
What Tools do I need?
- Power Drill and correct sized drill bit.
- A whip from the tree OR a matching cutting in another pot.
- Wire to support and hold the graft.
- Grafting knife to clean the wound and expose the cambium.
- Wooden Toothpicks to act as wedges.
- Cut Paste (To seal around the whip / wound site).
Selecting the best Trident Whip Cutting.
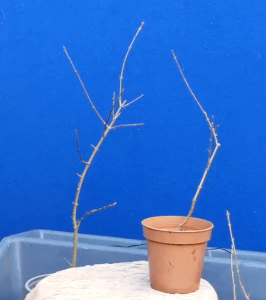
If you have been able to plan ahead of time, then you would have allowed several shoots to extend from the
previous growing season. These can then be manipulated with wire into the required position for the graft to take place. If you are using growth from the same bonsai then it is always best to apply wire to that branch first. Usually up to the point where you will be poking it through the trunk. Make sure to leave a decent length beyond this point to allow you to wire the end of the branch once it has been ‘threaded’.
If you do not have long enough growth from the previous year then hunt around for some 2 to 3 year old rooted cuttings. You are looking for something that is really just a single slim shoot that will be easy to work with.
Some drilling is required.
I use a standard drill at normal speed. Some people recommend using a slow speed but I have found this can result in more damage to the tree. Make sure you have marked exactly where you want the whip to enter and leave the trunk. Use a screw or sharp object to create a guide hole for the drill bit. You definitely don’t want to have it sliding across the bark, causing unwanted damage.
The KEY TIP is to start drilling where you want the whip to exit from. This ensures you will have the smallest possible hole for the graft to take. Remember that when drilling, it is the EXIT hole that is always larger and often, ‘blown out’.
Once you have finished drilling then be sure to use some wire to poke out any debris. Clean up the edges with your blade or knife to make the site of the fusion a lot more receptive to the whip when it is wedged in place.
Doing the Thread Graft:
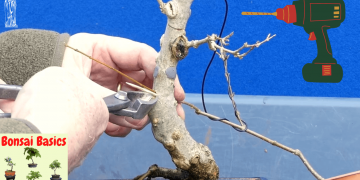
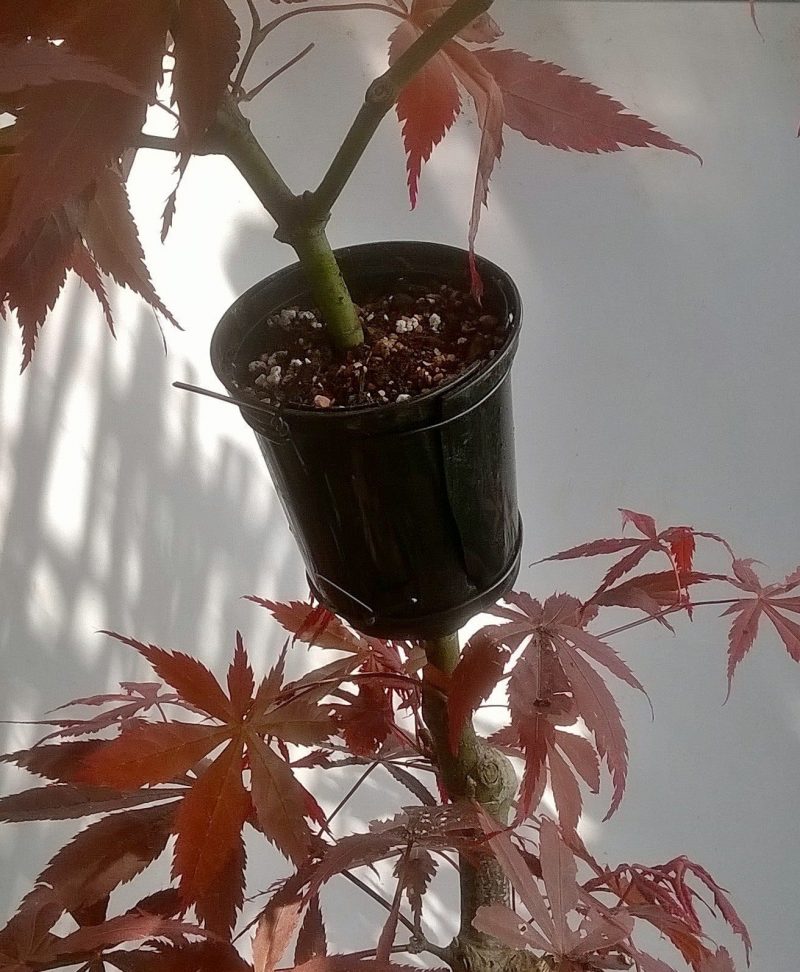
This is the simplest aspect of the operation and requires you to carefully push the whip through the hole you have created UNTIL you are unable to safely push it further without removing buds. Then use the remaining wire to secure it in place and/or wire to the whip end for branch movement. This is easiest explained by looking at the picture.
With thin barked trees like Maples it is not necessary to expose the cambium, however, I do this anyway and then wedge it against the upper side of the drilled hole using toothpicks. This method is aimed at making the fusion with the mother trunk more effective. If the whip and tree is healthy then as the buds open and extend (through spring) the shoot will thicken causing fusion to take place at the exit and entry points.
Do not carry out any operations on this tree as you want all of its energy to be directed towards shoot thickening. I would definitely recommend keeping the tree out of the wind or any sort of direct sunlight until you have seen a good flush of healthy growth.
Aftercare:
I would keep the tree fertilised and well watered and cut back a lot of the growth EXCEPT for the threaded whip. I would allow this shoot to extend as much as it can and leave it unpruned. The aim is to encourage thickening and this will only occur if there are buds and new shoots growing off of it.
Watch out for any wire that you have used – as would be the case for any bonsai. Keep an eye out for signs of thickening and callousing around the exit point of the graft as this should be a sign of succcess.
I will be expecting to seperate the whip from the original cutting during the following spring (2025).
UNDER NO CIRCUMSTANCES SHOULD YOU EVER HAVE A ‘BRAIN FART’ AND UNEXPECTEDLY STRIP ALL OF THE NEW BUDS FROM YOUR GRAFT 🙂
God Bless & Happy Bonsaiing
Xavier

